In the high-end animation industry, efficiency isn’t just measured by drawing quality, but also by the speed of iteration. One of the biggest challenges for post-production teams is managing effects on complex characters: How do you light a specific area or change a shadow without wasting hours navigating through hundreds of layers? How do you ensure that a last-minute client change doesn’t mean redoing the entire rig from scratch?
The answer isn’t to work harder, but to implement a node-based filtering workflow. This is a methodology that top-tier studios have already adopted and that makes a real difference in delivery times.
The end of the “Layer by Layer” work
Traditionally, applying a lighting effect to a specific element—such as a character’s backpack, the shine in their eyes, or the metallic reflection of an object—required direct intervention in the Rig hierarchy. This method is “destructive” and extremely prone to errors: a single wrong click can unlink a bone, break a deformation, or create visual inconsistencies that are only detected at the time of rendering.
The problem is exacerbated in long productions or those with multiple artists working on the same file. Every manual intervention within the rig is a latent risk. And in an environment where deadlines are tight and client reviews are constant, that risk becomes a real cost.
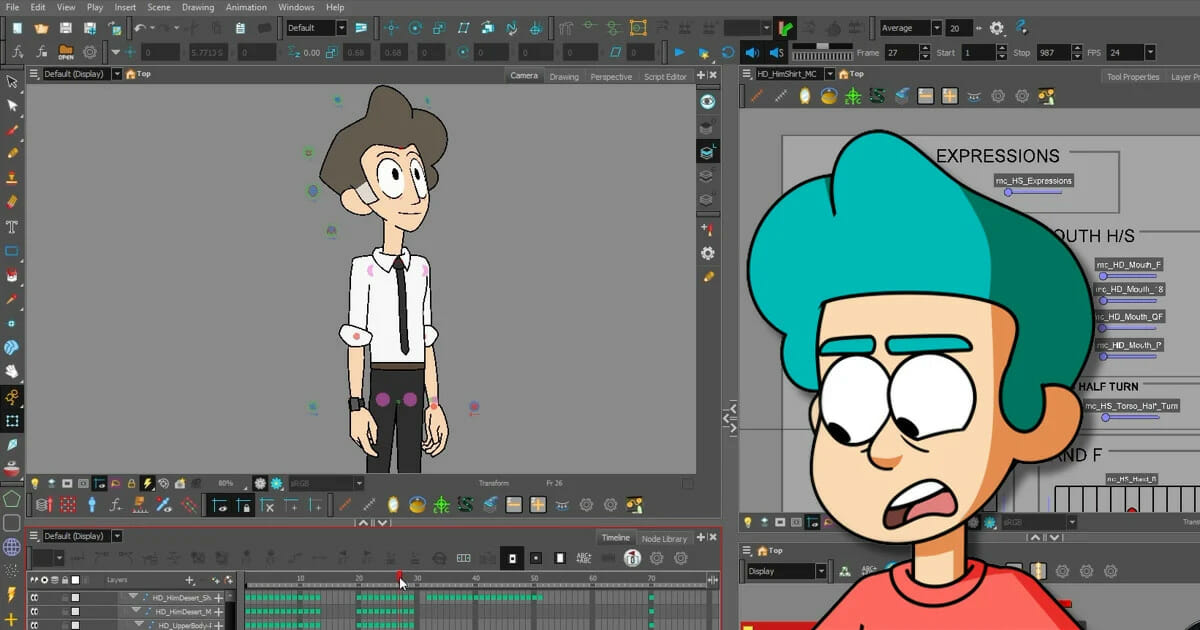
Harmony’s Port Filtering technology is a game-changer. It allows compositing artists to apply effects completely externally, while maintaining the integrity of the character’s skeleton. In other words, the rig is never touched, but the visual result can be completely different.
How does precision filtering work?
The key to this workflow is tag-based identification. Instead of manually searching for a layer among dozens of nested groups, the system reads the “identity” of each part of the drawing through pre-assigned metadata. This allows the effects logic to be declarative: instead of telling the software where the layer is, you tell it what you want to affect.
1. Global Application, Local Control
The process begins by applying the effect node—a color curve, an exposure adjustment, a lighting effect—globally to the model. Although it initially affects the entire character, this establishes the foundation for the new lighting state. From there, the work consists of refining, not building from scratch.
2. Isolation using Filters
By inserting a Port Filter node into the group’s output stream, we can tell the software exactly which data to allow and which to block. By selecting specific tags—for example, Shadows_Accessories or Highlight_Face —the effect is retracted from the rest of the body and surgically concentrated where needed. What previously required manually modifying multiple layers is now accomplished with a single selection.
3. Preservation of Visual Coherence (Matte Mode)
One of the most common mistakes when isolating effects is that they lose their original boundaries, resulting in unwanted color spills or halos around the edges of the image. Using Matte Mode is crucial here: it ensures that the effect respects the original cutout and opacity of each element, guaranteeing a clean, professional finish. Without this step, the workflow is incomplete.
Quick guide: Applying targeted eyeshadows in seconds in Harmony
Once you understand the logic, the implementation is surprisingly straightforward. These are the key steps:
- Effect Node Connection: Apply your color curve or lighting effect to the main group of the part you’re working with. Don’t worry if it affects the entire model at this point; this is the expected starting point.
- Inserting the Port Filter: Connect it to the group’s output to begin “cleaning” the data flow. This node is the core of the entire technique.
- Logic Configuration (Inverted): Here you make a strategic decision: will the filter exclude the effect from an area, or will it concentrate it only on that area? In the case of applying specific shadows, we deactivate the inversion to work in inclusive mode.
- Label Selection: The critical step in the process. We choose the label for the exact part—for example, backpack shadows —so the software knows with surgical precision where to apply the change. A well-defined label from the start of the project is what makes this step seamless.
- The professional touch (Matte Mode): Essential for maintaining visual clarity. It ensures that the color does not bleed beyond the edges of the original drawing and that the final result is indistinguishable from a handmade work, but in a fraction of the time.
Competitive Advantages for Animation Studios
For a technical director or studio owner, this methodology is not just a technical detail: it represents a direct and measurable return on investment.
Reduced turnaround times: Lighting changes in complex scenes—which previously could take hours—are now done in seconds. This directly impacts the team’s ability to respond to revisions without compromising the schedule.
True scalability: A single character can adapt to multiple lighting environments—day, night, interiors, dramatic scenes—using a single external node structure. There’s no need to maintain separate versions of the file for each context.
Reduced errors and corrupted files: Since you don’t have to “open” the rig to edit it, the risk of corrupting animations or breaking deformations disappears completely. The original rig is protected against accidental modifications.
Smoother collaboration: In teams where different artists work on compositing and animation simultaneously, this separation of responsibilities avoids version conflicts and accidental overwrites.
Conclusion
The maturity of an animation project is demonstrated by its ability to simplify complexity. Implementing tag-based filtering techniques isn’t just a design tip; it’s a strategic decision that allows artists to spend less time managing files and more time focusing on the visual quality of the content. Ultimately, it’s the difference between a pipeline that scales and one that breaks down under pressure.
Studios that adopt this type of workflow not only deliver faster, but also protect their most valuable work: the finished animation.
Is your team spending too much time on manual tasks? Optimizing rigging is the first step towards scalable production. At Aufiero Informática, we advise you on implementing the best industry-standard tools and taking your pipeline to the next level.